Riven Guide Part 4
|
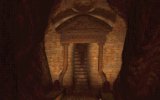
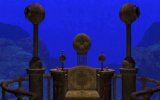
Leave the map room and take the catwalk around to the left, there is another dome! it can be opened just like all the others, but the viewer seems to be a bit knackered so you have to guess when to press the button. There is nothing else to see here yet - head back to the mag-lev, rotate it and get out the other side. Get ready for another educational session....
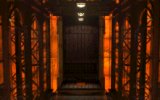
Head through the door into the firey cave, pull the lever on the left, this calls the lift. Go inside and press the button to voyage down into the underworld. Now follow the path straight ( ignore the left hand exit for now ) and you'll be in the educational throne room. This is another key section - here you learn the D'ni colour system! Sit yourself in the throne and press the pink button, then pull the right hand lever to activate the first control panel which lowers down in front of you.
Each symbol represents a colour. Use the big rings on the edge of the panel to rotate the dial, then press the symbol when it appears in the red section to see a coloured light. One of them can't be discovered but I think I have told you earlier that it is purple.
Now remove that panel and lower the left hand lever to activate a second panel. Press the two squarish nuts to activate Ghen's spy telescope! After letching the locals, press the pink button to escape from the chair and continue on. Head back down the path, and take the right hand exit. Call the mag-lev and go.
 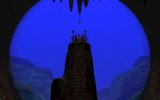   |
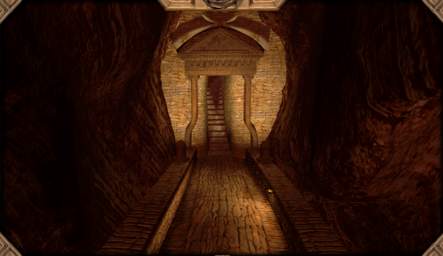
Now there is another lift to go in. Move the handle up one notch, pull the lever that appears on the left and walk down the unfolding steps. Look familier? There's a new switch that appeared on the left piller, it opens and closes the dragon's mouth .... but it's of no use. Go back into the lift and move the handle up another notch - there's another rotating dome! This one can be stopped, but it is not essential to do so. Continue up the stairs and cross the bridge to the tower - enter and pull the left lever. Ohh, nice view! But we're here on buisness,remember. Press the right lever to rearrange the floor below, then press the left one again and head back to the village. ( take the lift back down to the dragon's head and follow the left fork)
Now head back to the wooden platform - the sub should be waiting for you, like a nice, well trained, obedient little metallic puppy, that can go underwater and... oh never mind. I think Riven is driving me mad. Swivel it around and head off. Carry on past the first point and get out at the next stop. Now you are at the pretty area you have just opened from the tower. Pull the little triangular handle and sit on the seat and get yourself winched up to....
| jfsgjsgpdsgjds[ojgsdapgjdosg;ldsmgpiodjgp#;odjsgodsgj'psjd;hgkjds[jfdspghdsoijg;dsjgodsj | 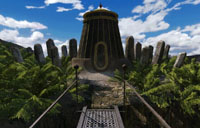 |
Wave at the criminal deviant who's locked up in his cell (remember you were locked up at the start) then turn to the right and press the button that unlocks the bars. Now investigate the grating on the floor - there is a secret lever hidden in the water underneath which opens another secret passage in the wall! Head through this dark tunnel to reveal ... absolutley nothing at all!
But there is a way out of here. See the little switch to the left hand side of the tunnel as you face the water? It's actually a light switch. Activaiting it allows you to see a little further back into the darkness behind you, so turn around and hunt for another light. Turn this one on, find the next switch and so on. Eventually you will illuminate a hidden doorway set into the wall on your left. Open it and walk through to the....
This is the hardest part of the game so far. By miles. Five of these stones need to be pressed in the right order to proceed past the dagger stone into the age of Tay. But what is the right order? And what are those stupid animal things? Well .. have you noticed the wooden balls set into various parts of the islands? They have numbers written on the back and one of them did indeed have a dagger planted near it. So its the numbers and animal noises (!) on these wooden balls that reveal the code sequence.
Solving the stones: The numbers on the back of the wooden balls ( 1-5 in D'ni) tell you which order to press the stones, while the shape of the surroundings corresponds with the shape of the animal design on the important stones (imagine the wooden ball is the eye, then take a broad look at the area ) Also pay attention to the noise the balls make too....
Okay so the second stone to press is the one with the inkbeetle logo on - remember the water flooding the pool and forming a beetle like shape? Number three is the Ytram, thanks to the shape of the cave as you look out. Number four is the thin seal-like Sunner and number five is the rock shaped and strangely fish like Wahrk.
The Final Code: And number one? Well it doesn't seem to have an obvious shape and the solution is pretty obscure. The Wahrks may well make that loud noise, but the fish? Number four sounds more like the Sunners that were lying on the beach earlier on, which gives us this final stone pressing sequence.
(Sorry about the quality, they were the only
pictures I could find)
Finally. Now the water barrier in front of you disappears revealing a draw containing one of Ghen's linking books that Catherine has activated. This is the first linking book that works - put your hand on the image to link to Tay!
Now this is a scary place. Whatever happens, those two shifty Rivenease blokes are gonna mug you, drag you off (probably by the ears) and lock you in a room. Explore this new place for a bit - a woman called Nelah will eventually appear. She brings two books, Catherines Diary and the trap/prison book. Here you can learn a bit more about the story, Including the plan to trap Ghen, free Catherine from th prison and signal Atrus, and after that, its back to temple Island to activate the islands' power source.